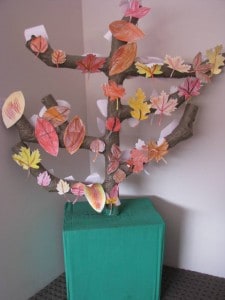
With spring finally here in Australia, I am aware that autumn has just begun in other parts of the world. I thought I would share our autumn tree that I made with my kids earlier this year before starting the Learning4kids website. We have decided to make a tree for spring and have been collecting cardboard rolls ready, which I will be sharing in another post.
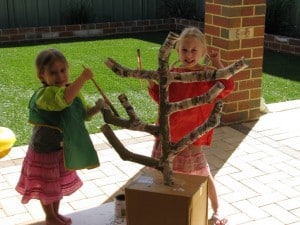
With the start of autumn earlier this year got my kids thinking and talking about different seasons. The changes in the colours of leaves and watching them fall from the trees. Autumn was a particular interest and this started the planning and creation of our autumn tree. We had so much fun sticking, connecting, problem solving, and gluing, painting and colouring in. We made this over a period of two days but we were lucky we had fine weather to help dry the paper mache.
How we made our Autumn Tree?
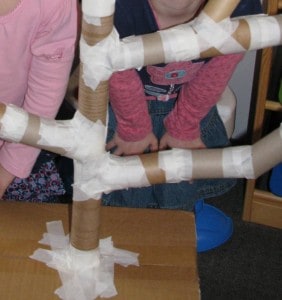
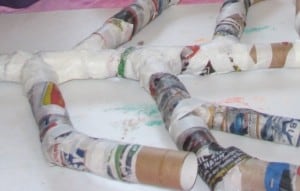
Over a period of time we collected a number of paper towel and toilet rolls. We cut holes and splits in the cardboard to connect them together to make the shape of a tree. We then used masking tape to hold it together more firmly.
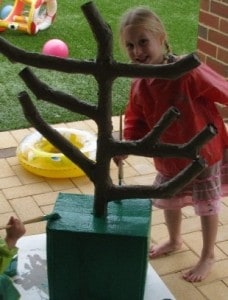
Place a rod or stick through the centre of the tree. This helps to make the box strong and to stop it from falling over as the tree gets very heavy and off balance. It gets extremely heavy when applying the wet/gluey paper mache. I recommend laying the tree down flat when applying the paper mache and then using the rod when it is dry ready for painting.
Let’s Glue
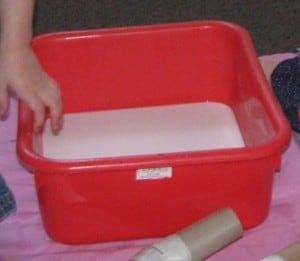
Fill a large container filled with PVA glue mixed with water and have a pile of torn strips of newspaper ready. Dip the strips of newspaper into the gluey mixture and wrap around the cardboard tree until all is covered. This also helps strength the joins between cardboard rolls.
Let’s Paint
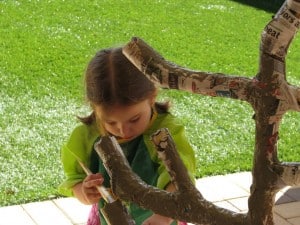
The fun part: painting the tree!
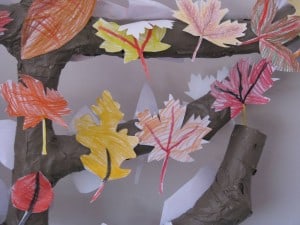
Just about finished!Now adding the leaves!
We spent a lot of time looking at books that showed pictures of autumn leaves and we also went for a walk to look at the colours of leaves.
When we decided on the colours, red, orange, brown, black, yellow and some were green, we collected every autumn colour crayon and pencil we had for colouring in the autumn leaves. Then we cut them out.
We stuck them onto the tree using double sided sticky tape.
We have also made a Paper Mache Spring Tree! Read about it here.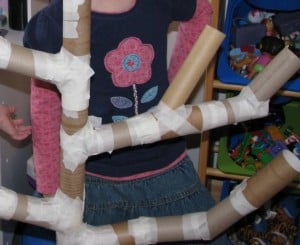
This is such a great craft! It looks like they had so much fun doing it and it’s a lovely finished product. I love paper mache! Thank you for sharing.
Thank you for stopping by Joyce! It’s so wonderful to have you here!
xx
Hi Guys,
What a great site, we got so into it that we burnt the pizza, Bonnie and I have been getting excited about doing the toilet roll tree (we are running out of things to do with our rolls).
Thanks for all your effort we will be back often
Love Wendy and Family
what a great tree and really you can use something like this for all seasons!
Thanks for lining to the Sunday Showcase & sure hope to see you this week!
Bern
http://momto2poshlildivas.blogspot.com/search/label/Sunday%20Showcase
Love this Janice. You have some fantastic content on here now! This is just wonderful – and recyling too!
This is awesome! Starting on our tree tomorrow! Thanks for sharing:)
Hi Janice,
I came across your sight yesterday as i was looking for something different and I found your site.I have a preschool in Ireland and am always looking for class activities for our children to do and i also cater for 2 children with special needs and find that these activities include all the children and I cant wait to tell the children tomorrow of our new art project for the Autumn. Thank you