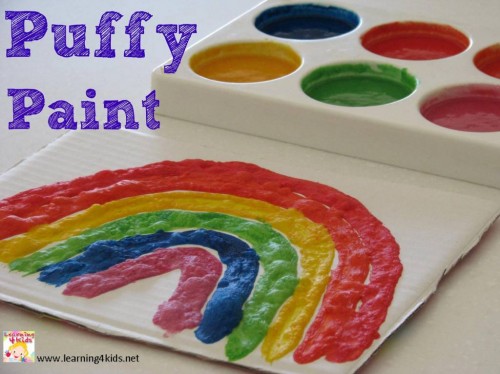
How to make Puffy Paint? There is something magical about Puffy Paint and it is a must try for any child or toddler to paint and play with. It is super easy to make with all the ingredients you need right in your pantry and after your child has finished painting, place it in the microwave for the magic to happen…….It is SO much FUN!!
What you will need?
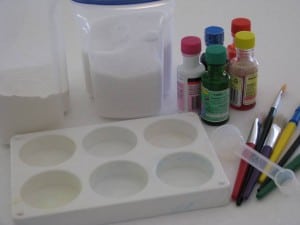
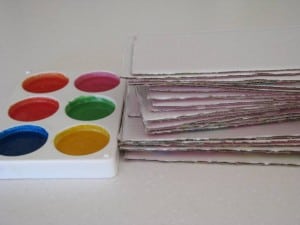
You will need self-raising flour, salt, food colourings, paint brushes, paint tray, measuring spoons, water and cut up pieces of cardboard. There are a number of recipes out there for puffy paint but I had a bit of an idea of what was included and had a play around with the main ingredients until I found the right consistency and quantity for our paint pots. Here is the recipe that I found to work well.
Recipe for Puffy Paint
- 1 Tablespoon Self Raising Flour
- 1 Table Spoon Salt
- 3 Teaspoons Water Food Colouring
- Continually mix the ingredients with a paint brush until all ingredients have combined well into a paste.
- Repeat the recipe for each colour.
Let’s Play
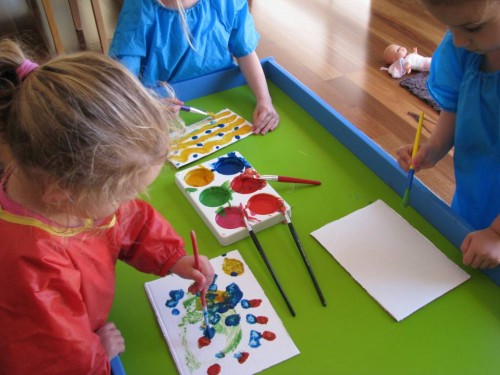
We used thick cardboard that I cut up from an empty nappy box and also cut the cardboard into smaller sizes to fit into the microwave. My girls’ just painted one picture after the other until all the puffy paint and cardboard was gone! I would recommend that the paint be painted on thick so when they are cooked they are extra puffy!
Let’s Play
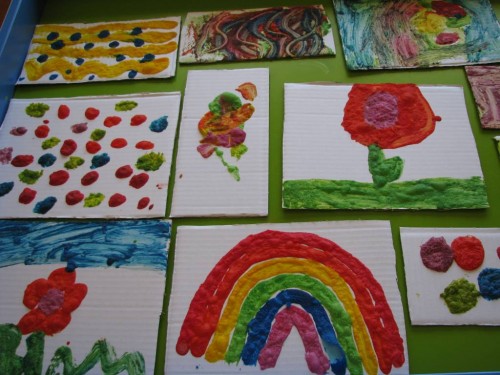
When the paintings were all finished we placed a microwavable bowl in the centre of the microwave and put 1 painting at a time on top of the bowl. Different microwaves will require different times; this is something you will have to trial to see how long you need to cook the puffy paint to make it puff. Our microwave roughly took 25 seconds to puff the paint but I did stop at intervals to check that I was not overcooking the puffy paint. The puffy paintings should come out warm not hot, so keep an eye on the time to avoid over cooking.
The learning benefits of this activity:
- Encourages creativity and self-expression with paint
- Eye and hand coordination
- Fine motor development
- Experimenting and exploring with a new paint tool
- Sense of achievement and pride
- Colour recognition
Available in our online shop:
Printable Dot-to-Dot Alphabet Letters
So fun! You can also make impromptu puffy paint out of cornstarch, water, and a little bit of finger paint. Works like a charm.
Hi Janice, if you use cornstarch does it still need to be put in the oven/microwave?
Thanks
Lisa
Hi Lisa, I am not sure about the cornflour. If you give it a go let me know how it works out….thanks! 🙂
What can I use instead of food colours, can I use my kid water colouring box?
Hi Mona, yes I think the water colours should work the same as food colouring. Have fun! 🙂
I love puffy paint and you just reminded me that i t has been too long since we made some to play with! The kids artworks are lovely!!
Does this work using a regular oven? We don’t have a microwave. Thanks!
Hi Tana, Sorry, I’m not really sure if this would work in the oven. I am interested to know now too…..I guess you will have to try but keep an eye on it while it is in there so that it doesn’t get too hot. Let me know how you go! 🙂 Thanks!
no idea, however, curious if a hair dryer might heat it up enough
I have never tried a hair dryer Melissa but it might just work. Let me know how you go with it! Thanks !:)
I have had puffy paint on my mental to do list for too many years to count – will be breaking this out for my kids when i get hold of a box to cut up! thanks!
Hi Deb, puffy paint is so much fun and my kids have been asking if we can do it again. If you don’t have a cardboard box, you could try some card stock or other types of thick paper such as cartridge paper which is used for art/painting. Have fun with it and be sure to share some pics! xx
I’m looking after a lil one who is allergic to any wheat products what can I use instead of the self raising flour ?
That is a really good question Neets. I just googled substitutes for self-raising flour and flour and found that you can use baking powder or baking soda to help puff up the paint. I wonder if you could mix baking soda or baking powder with corn flour to help make the paste? I hope this helps and good luck with it. Please let me know how you go because I am sure there are other readers who would find this information useful. Thanks!
some baking powders have gluten! Just use rice flour with xanthan gum, which is the gluten free flour riser!
Tell us how it worked out.
Agus
This looks lovely! I saw a post somewhere else where they used a slightly different recipe and squeezy bottles to paint with and I have been looking everywhere for those darned bottles! Little did I know I could just use paintbrushes! Looking forward to trying this soon! 🙂
Squeezy bottles sound great too….I will have to try this one! 🙂 Thanks Ailsa!
Yay! Another great activity to add to my list, and just as colourful as the other too. Thanks Janice, I do love all your hard work and I bet your kiddies do too!
Love how bright the colours are! We will be trying this for sure, pinning now – thanks!!
Puffy paints?!?! A blast from the past!! Thanks for sharing. 🙂
This is a childhood favorite for sure! I love your photos. Great idea using a rainbow. Thanks for sharing with The Sunday Showcase.
I will be featuring this tomorrow.
Thank you so much Allison, I look forward to the post! x
What a great post – I will definitely be trying this one. My mini monkey is not so good with her colours…this may be a good way to inspire some colour recognition rehearsal! Thanks
Hey. This is awesome, but my question is will this get moldy? I’ve read a few places that homemade paints have a tendency to mold. Please e-mail me the answer if you know 🙂 thanks
Hi Ally, With this recipe I haven’t had any problems with the paint going mouldy yet but then again we tend to use it up pretty quick. There is so much salt in this recipe, I think this helps to stop it from moulding. Good luck with it!! 🙂
Just did this with 2 children 8 and 9 they love it
Easier on yet…. Shaving cream and white school glue. Mix up add liquid food coloring and there ya go. My students love it, but have a hard time waiting for it to dry!
Hi just wondering if u could use this on fabric as well? ?
I have trouble when the weather is damp as the paint goes soggy. Is there a way I can stop this or should I use it as a science experiment
Why use salt though?
All in all, a fantastic idea..many thnx
Hi i think that this is a lovely idea but please can you tell me where i need to put the cardboard….. many thankx 🙂
your website is very helpful……….
this is going to fun and i’m excited to do it with my 4 year class thank you very much
We have done puffy paint using shaving cream, white PVA glue and food colourings… no heating required. Once the artwork is complete just put aside to air dry.
I have tried 4 times with my kids but never successfully puffed. Why?
Hi Bella, sorry to hear this…..maybe try to cook it a little longer, I found this helped to get the paint to puff more when we have made it. I also found if the paint was applied thick on the cardboard, it would puff more. Also are you using self-raising flour? Good luck!
Can you puff up the paint using an embossing heat tool please?
thankyou
Brenda
Does cornstarch work on this project?
Thanks for sharing these creative ideas!
Am looking for new ideas, activities, worksheets..concerning topic “homes & harvests” other than traditional ones. so can you help?
I work at a preschool with 2 years old and this sounds really fun. My question is do I have to put the finished product in a microwave?
Hi Ray, to make the paint become puffy, it needs to be placed into the microwave. Hope this helps, have fun! 🙂
Is the recipe for each color?
Hi Emily, yes, you repeat the recipe for each color. Have fun! 🙂
Puffy paint question: how can I save leftover paint? Fridge or in a bottle with or without top.
hi Janice, its sara here, does puffy paint dry puffy or is it only whilst painting?? please reply asap
Hi Sara, puffy paint dries puffy once it has been placed in the microwave. Thanks.
Hey, this is such a cool activity. Would love to try with nephew and niece. :). But can you please tell me how long it could last. since we are using flour, will it last for longer time like regular watercolors painting?
Hi , can you tell me how easy the clean up would be? Does it stain or is it easy to wash off if my little ones spill it on the table or carpet? Thank you